


When you’re swamped with a landslide of feature demands, with no time to design your app, it can help to have design templates or libraries on-hand. Once you install the ones you need, you then have all the assets and icons needed to get started, and complete the project faster.
Font Awesome is one well known library. By combining Font Awesome and React, you’ve got a great solution for getting your application done on time, with an effective design supported with a good icon set. This article explores Font Awesome, React, and how they interact with the TinyMCE rich text editor.
As a flexible and customizable rich text editor, TinyMCE is an essential component for React apps. Including it as your app’s text editing component speeds up your development time.
This article shows you all the steps to get set up with Font Awesome and React, and how to include TinyMCE within the demo.
✏️NOTE: Font Awesome makes use of SVG images, which can present some security problems. But there are substitute unicode icons that can work instead. This how-to guide specifically looks into providing icons within the TinyMCE text editor for your customers to use when making their content. It also briefly touches on using Font Awesome icons within the TinyMCE User Interface (UI), which is the other use case for SVG based icons in text editing.
Font Awesome and React security with TinyMCE
TinyMCE can’t make use of Font Awesome icons without a third party, custom plugin. This is because Font Awesome makes use of SVG image files for its icons. While SVG format icons are useful for animation and other design effects, the security risk involved means these icons cannot appear in the TinyMCE text area.
These files are blocked from entering the TinyMCE text area by any means (APIs, manual copy and paste) to keep TinyMCE secure from Cross Site Scripting and other security risks associated with SVG image files.
An alternative is to make use of unicode characters, especially if the goal is to provide your customers with icons they can place in the text area when creating their content. The demo in the following sections makes use of unicode characters within the text area, and makes use of the TinyMCE Character Map plugin for this customization.
Font Awesome, React and customizing TinyMCE UI
For a custom TinyMCE UI, such as adjusting the icons within the interface, you can make use of SVG assets to update and change the TinyMCE icon packs. Changing icons packs changes the icons used in the UI. You can also adjust the UI icons using the TinyMCE addIcon() API method. For more information, check on the guide explaining how to add a new icon using an icon pack in TinyMCE.
❓NOTE: SVG images for the TinyMCE icons are not a security risk since the interface icons are not saved as SVG files. They are instead saved in JSON format within a JavaScript file. For example, the Accessibility Checker (Premium) plugin icon is referenced in the icon.js file in the following format:
'accessibility-check': '<svg width="24" height="24"><path d="M12 2a2 2 0 0 1 2 2 2 2 0 0 1-2 2 2 2 0 0 1-2-2c0-1.1.9-2 2-2Zm8 7h-5v12c0 .6-.4 1-1 1a1 1 0 0 1-1-1v-5c0-.6-.4-1-1-1a1 1 0 0 0-1 1v5c0 .6-.4 1-1 1a1 1 0 0 1-1-1V9H4a1 1 0 1 1 0-2h16c.6 0 1 .4 1 1s-.4 1-1 1Z" fill-rule="nonzero"/></svg>',How to set Font Awesome in React, and include TinyMCE
The following steps explain how to get Font Awesome and React running as a component, and then how to add unicode to TinyMCE to provide icons similar to Font Awesome icons.
- Set up a new, demo React app in your development environment:
npm init react-app react-lms-1-1
✏️NOTE: you can also run the npx create-next-app@latest command, and accept the default options when prompted. If you use this method, and you need a src/ directory, make sure you select Yes to the '✔ Would you like to use src/ directory? … No / Yes' prompt question.
- Install the TinyMCE component for later:
npm install @tinymce/tinymce-react- Install the Font Awesome icon packs:
npm i --save @fortawesome/fontawesome-svg-core
npm install --save @fortawesome/free-solid-svg-icons
npm install --save @fortawesome/react-fontawesome- Navigate down to the src/ folder.
cd src/- Create a new folder called components/ for storing the Font Awesome Demo, and TinyMCE.
mkdir components/- Change into the new components/ folder, and create two new files, one for TinyMCE, and one for the Font Awesome demo:
touch editor.js icons.js- Add the following contents to the files:
- For editor.js, and the following, and place your TinyMCE API key into as the value for the apiKey option. Adding your TinyMCE API key is important, preventing domain name or other messages appearing in the text area.
import React from "react";
import { Editor } from "@tinymce/tinymce-react";
export const Tinymce = () => (
  <Editor
    apiKey="add your API key here"
    init={{
      height: 500,
      menubar: true,
      plugins: [
        "advlist",
        "autolink",
        "lists",
        "link",
        "image",
        "charmap",
        "preview",
        "anchor",
        "searchreplace",
        "visualblocks",
        "code",
        "fullscreen",
        "insertdatetime",
        "media",
        "table",
        "code",
        "help",
        "wordcount",
      ],
      toolbar:
        "undo redo | blocks | " +
        "bold italic forecolor | alignleft aligncenter " +
        "alignright alignjustify | bullist numlist outdent indent | " +
        "removeformat | charmap | code | help",
      charmap_append: [
        [0x2615, "morning coffee"],
        [0x2611, "check box"],
      ],
    }}
  />
);
- For icons.js:
import React from "react";
import { FontAwesomeIcon } from "@fortawesome/react-fontawesome";
import { library } from "@fortawesome/fontawesome-svg-core";
import { faCheckSquare, faCoffee } from "@fortawesome/free-solid-svg-icons";
library.add(faCheckSquare, faCoffee);
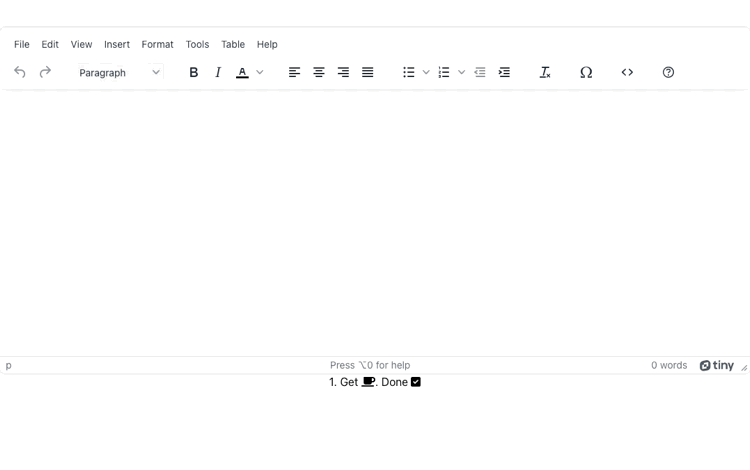
export const IconChecklist = () => (
<div>
1. Get <FontAwesomeIcon icon="coffee" />. Done{" "}
<FontAwesomeIcon icon="check-square" />
</div>
);
- Change back into the App/ directory, and open the App.js fileReplace the contents with the following:
import "./App.css";
import React, { Component } from "react";
import { Tinymce } from "./components/editor.js";
import { IconChecklist } from "./components/icons.js";
class App extends Component {
  render() {
    return (
      <div className="App">
          <Tinymce />
          <IconChecklist /> {" "}
      </div>
    );
  }
}
export default App;
- Save the change
- On the command line use npm run start to test out the font awesome icons in your demo app's rich text editor:
The Font Awesome icons are configured by the React component, and the TinyMCE custom characters similar to the icons are available in unicode format. Remember to get your FREE TinyMCE API key, and include it in your configuration.
Font Awesome, React, and more with TinyMCE
TinyMCE’s flexibility and effortless customization enables you to adjust the UI, meeting the often subtle requirements for your app’s design to be truly ready for your customers. It can help you get out from under a design requirement landslide, and get your application completed.
Make use of the TinyMCE React integration, as well as useful plugins like the TinyMCE Charmap, to give your customers the icons they need for their content in a reliable framework.
For more on design and TinyMCE with React, check out the guide that explains the steps in setting up TinyMCE in React with an emoji picker.
Contact us today if you have any questions on how TinyMCE can integrate into your React projects.


