


All websites have elements that respond to different devices. A useful textarea, is a major website component that needs to be responsive – changing based on the viewer’s screen, or the content the view creates within it. If the textarea component won’t change it’s size through the page style, or offers no clear way to set up autoresize, then you’ve got a problem. Let’s fix that…
A reliable textarea should respond, and autoresize, based on the content added to it, and it shouldn’t take hours of time and effort to reconfigure the textarea for responsiveness.
What’s most helpful is a rich text editor that provides an easy method to set the textarea height, textarea width, and textarea autoresize capabilities. And it’s not too much to ask that these features are ready to use out-of-the-box. Why? Because textarea autoresize should be a given, so you can instead focus on other aspects that are critical in your app.
This article shows how you can get autoresize done with TinyMCE, by making use of TinyMCE’s reliable options and plugins.
Table of Contents
What does autoresize and responsive textarea mean?
Autoresize vs responsive design
Autoresize vs the resize CSS element
How to use the TinyMCE Autoresize plugin
3. Set up textarea autoresize with TinyMCE
How to set up textarea height automatically
How to make the textarea non-resizable
How to disable textarea resize
Why set textarea autoresize?
Setting up textarea autoresize helps users create content without distraction and improves their user experience.
Think of it like water. A good WYSIWYG textarea should change size and fit, whenever it’s under pressure – the way water changes shape depending on the cup that holds it.
“If you put water into a cup, it becomes the cup”
What does autoresize and responsive textarea mean?
When an element in an HTML page or within an app can autoresize, it changes its shape based on:
- The HTML content inside the element
- The other elements and content on the page
The autoresize ability is an important part of responsive design. It is distinct, however, from the resize CSS design element.
Autoresize vs responsive design
While textarea autoresize should be easy to implement, responsive design is a far broader area that involves the entire web page appearance and deserves a larger amount of time and attention.
When responsive design is introduced with something like media queries, the web page changes not just size, but layout and other element positions, depending on the device the customer uses to view the page. In this case, the textarea also becomes responsive, along with the rest of the page.
In short, the responsive HTML encompasses more than size.
There are a range of design elements that front end developers set up to change automatically with responsive design. These capabilities are beyond textarea autoresize, and beyond the scope of this article.
Autoresize vs the resize CSS element
Resize is a CSS element. It requires a different configuration compared to autoresize. The advantage of an dedicated autoresize option (TinyMCE provides one, and it’s explained in the next section) is the speed of implementation.
Configuring the resize element in the CSS for a web page delivers the following design outcomes:
- The ability for an element to be manually resized (or not) by a user
- How that the element can be resized
Once configured, the element can change its size when clicking and dragging the lower right corner of the box. It’s a manual action, not an automatic response to change.
How to use the TinyMCE Autoresize plugin
TinyMCE makes textarea autoresize configuration easier and quicker with a dedicated feature called the Autoresize plugin.
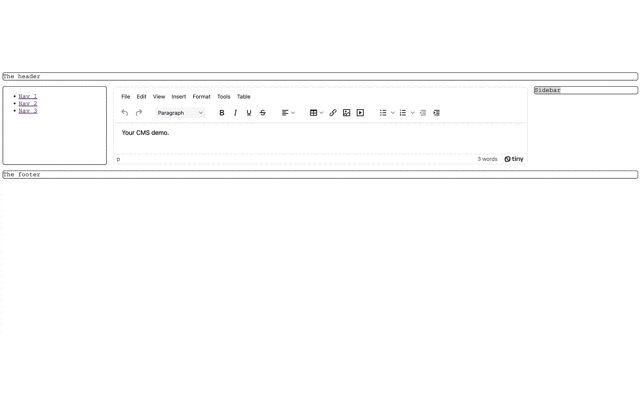
You can test run the Autoresize plugin and see its capabilities by checking out the demo Content Management System (CMS). In this demo, the TinyMCE editor that’s added in the center of the page,expands as you add more content.
The plugin has a number of useful options that make style issues around textarea autoresize configuration easier.
For example, autoresize_overflow_padding and autoresize_bottom_margin options to automatically set up responsive padding at the sides and bottom of the editor body. This creates a small amount of padding to increase readability, which is useful when there’s large amounts of text.
If you’d like to try configuring the plugin for yourself, the following procedures show how to do this.
1. Get TinyMCE
If you haven't used TinyMCE before, start here. Otherwise, head to the next section on the CMS demo content.
-
Go to tiny.cloud/signup
-
Enter your information, or use Google or GitHub credentials to log into the TinyMCE dashboard
-
Once you’re on the dashboard, check for HTML content under the Get Started Guide for TinyMCE editor and Premium plugins heading
-
Copy the HTML content found under this heading
-
In your development environment, create a new index.html file
-
Paste the content copied from the TinyMCE Dashboard into the HTML file
-
Save the file
With these steps complete, you can now load the index.html file in your browser. You can load the file directly by opening it with your browser of choice, and run the file through a local host with a Python command, or PHP command.
2. Set up the TinyMCE demo
-
In your project html file, adjust the HTML body content, replacing the “Welcome to TinyMCE!” contents with the following div, textarea, and other elements:
<!DOCTYPE html>
<head>
<script src="https://cdn.tiny.cloud/1/your-api-key/tinymce/6/tinymce.min.js" referrerpolicy="origin"></script>
</head>
<body>

        <div class="wrapper">
            <header class="main-head">The header</header>
            <nav class="main-nav">

                <ul>
                    <li><a href="">Nav 1</a></li>
                    <li><a href="">Nav 2</a></li>
                    <li><a href="">Nav 3</a></li>
                </ul>
            </nav>

            <article class="content">
                        <textarea name="" id="textarea" cols="30" rows="10">
                            <p>Your CMS demo.</p>
                        </textarea>
            </article>
            <aside class="side">Sidebar</aside>
            <footer class="main-footer">The footer</footer>
        </div>

        </body>

  <script>
    tinymce.init({
      selector: 'textarea',
      plugins: `anchor autolink charmap codesample emoticons image link lists media searchreplace table visualblocks wordcount`,
      toolbar: `undo redo | styles | bold italic underline strikethrough | align | table link image media | bullist numlist outdent indent`,
    });
  </script>
</body>
</html>-
Update the TinyMCE plugins in the default plugins list to the following:
  <script>
    tinymce.init({
      selector: 'textarea',
      plugins: 'powerpaste a11ychecker tinymcespellchecker linkchecker wordcount table advtable editimage autosave advlist anchor advcode image link lists media mediaembed searchreplace visualblocks template',
      toolbar: 'undo redo | blocks fontfamily fontsize | bold italic underline strikethrough | link image media table | align lineheight | numlist bullist indent outdent | emoticons charmap | removeformat',
    });
</script>-
Set up a style sheet for the CMS by adding style tags after the html head section:
<style>
    body {
        font-family: 'Courier New', Courier, monospace;
    }

    .main-head {
        grid-area: header;
        border: solid black;
        border-radius: 5px;
        border-width: 1px;
    }

    .content {
        grid-area: content;
        border: solid white;
        border-radius: 5px;
        border-width: 1px;
    }

    .main-nav {
        grid-area: nav;
        border: solid black;
        border-radius: 5px;
        border-width: 1px;
    }

    .side {
        grid-area: sidebar;
        border: solid black;
        border-radius: 5px;
        border-width: 1px;
    }

    .main-footer {
        grid-area: footer;
        border: solid black;
        border-radius: 5px;
        border-width: 1px;
    }

    .wrapper {
        display: grid;
        gap: 15px;
        grid-template-areas: "header" "nav" "content" "sidebar" "ad" "footer";
    }

    @media(min-width: 500px) {
        .wrapper {
            grid-template-columns: 1fr 3fr;
            grid-template-areas: "header header" "nav nav" "sidebar content" "ad footer";
        }

        nav ul {
            display: flex;
            justify-content: space-between;
        }
    }

    @media(min-width: 700px) {
        .wrapper {
            grid-template-columns: 1fr 4fr 1fr;
            grid-template-areas: "header header header" "nav content sidebar" "nav content ad" "footer footer footer"
        }
        nav ul {
            flex-direction: column;
        }
    }
</style>-
Save the changes
3. Set up textarea autoresize with TinyMCE
-
Add the the TinyMCE Autoresize plugin:
plugins: `powerpaste a11ychecker tinymcespellchecker linkchecker wordcount table advtable editimage autosave advlist anchor advcode image link lists media mediaembed searchreplace visualblocks template autoresize`,-
Include the autoresize_overflow_padding and autoresize_bottom_margin options:
//Autoresize texarea
      autoresize_overflow_padding: 5,
autoresize_bottom_margin: 25s-
Save the changes, and load the project.
You can now test the Autoresize abilities by adding text to the TinyMCE text area. For example, copy content from Alice in Wonderland, and paste it into the editor:
How to set up textarea height automatically
You can control the textarea height and the textarea width, and keep it to a set value, by adding the following options to your tinymce.init script
-
Decide on the textarea height and textarea width you require
-
Add the height and width options to the init script:
//Autoresize texarea
      autoresize_overflow_padding: 5,
      autoresize_bottom_margin: 25s

//Height and width
      height: 500,
width: 500-
Save the changes, and reload the demo. The textarea height and width are now set automatically when TinyMCE loads in the browser.
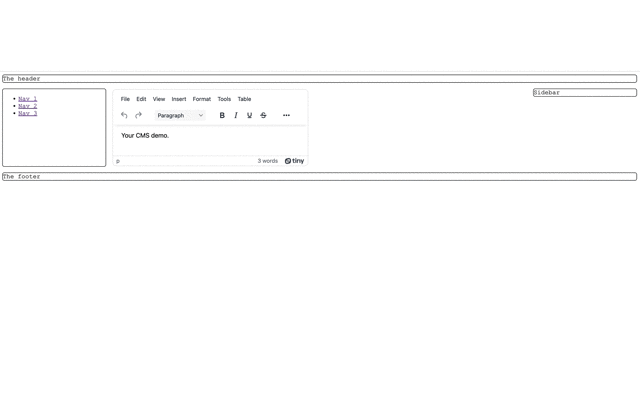
NOTE: When Autoresize is switched on and the options set to specific height and width, the textarea cannot be resized manually.
How to make the textarea non-resizable
To prevent the TinyMCE textarea autoresize, responding to new content added to it, configure the min_height and max_height options.
-
Add the min_height and max_height options to the tinymce.init script:
//Autoresize texarea
      autoresize_overflow_padding: 5,
      autoresize_bottom_margin: 25,

//Nonresize textarea
      min_height: 200,
      max_height: 600
    });
</script>-
Comment out the height and width options configured in the previous how to steps:
//Height and width
//height: 500,
//width: 500
-
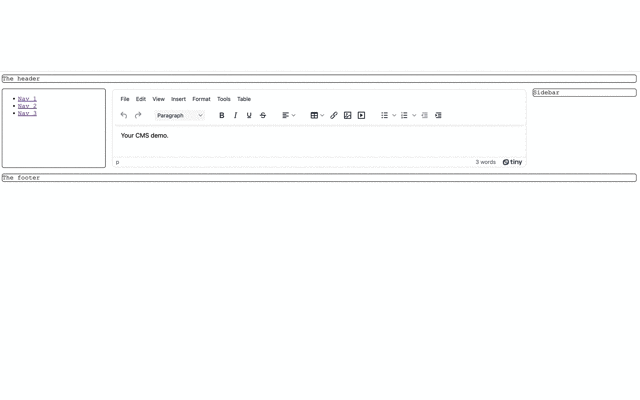
Confirm the Autoresize plugin is set to ‘on’. If set to ‘off’, the option to manually stretch the textarea becomes available. When the textarea has manual resize handlebars enabled, Autoresize won’t work. Keep this in mind when you’re setting up textarea autoresize
-
Reload the demo, and try to autoresize the text area by pasting in some content. You’ll notice that the text area is locked to the maximum height set, and won’t resize any further:
How to disable textarea resize
If you’re aiming to prevent the textarea from resizing, set the resize option in the TinyMCE init script to false. This effectively locks the editor from initialization by taking away the resize handle bar.
Here’s an example of the option based on the demo built in the previous sections:
  <script>
    tinymce.init({
      selector: 'textarea',
      plugins: 'powerpaste a11ychecker tinymcespellchecker linkchecker wordcount table advtable editimage autosave advlist anchor advcode image link lists media mediaembed searchreplace visualblocks template autoresize',
      toolbar: 'undo redo | blocks fontfamily fontsize | bold italic underline strikethrough | link image media table | align lineheight | numlist bullist indent outdent | emoticons charmap | removeformat',
      resize: false,
    });
  </script>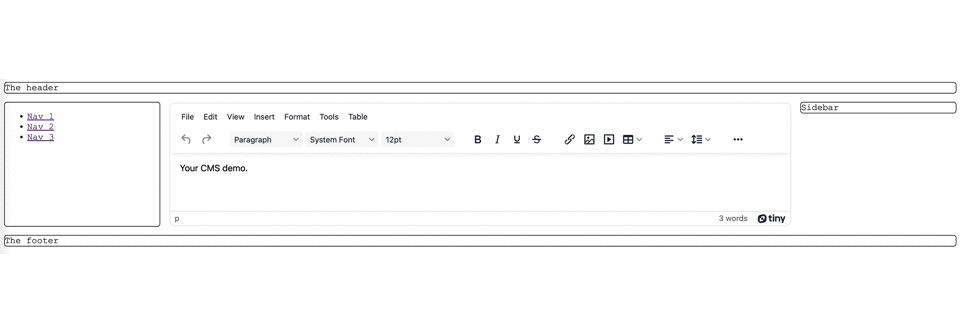
What’s next for autoresize?
Apart from configuring a responsive HTML editor with an autoresize textarea, you can also set up autoresize for different content within the textarea. Find out more about this by reading the configuration of the object_resizing property.
For more information on the CMS options available with TinyMCE, you can read more on the CMS solutions page.
Autoresize is just one of TinyMCE’s plugins. With access to Premium features through a paid TinyMCE plan, you can design and apply custom skin and icons.


